Okay as a crafter and seamstress, I love making gifts for other people but I have found that many of them do not appreciate them. So I wanted to break down the thought that goes into my making someone a handmade rag doll. This will so help explain why handmade rag dolls are priced the way they are. I try not to over price my dolls but in the end I only make my fabric money back plus a little bit more (way less the an hourly wage). Not only does it take a lot of time to make a doll but there is a lot of thought that goes into each one. We try and create a one of a kind doll with their own personality and name. The name has become something important to me, I bond with each one, call it by it’s name throughout the process. I had one customer ask for a name then my daughter want to name one and I rolled with it after that.
There may be some Affiliate links in this blog post, which means I make a small percentage of each sale. This doesn’t affect your price. I also linked a few Instagram photos of each some of the process I had posted about.
Here is a step by step break of how I make a handmade Analina Rag Doll/ Raggedy Ann:
1. For my dolls I pick a name or personality first, all Analina Rag Dolls (fabric hair dolls) and Stuffed Animals have a name that fits their outfits or theme. Some times this can be a long process and other times a name just pops in my head. I do have a running list so I don’t forget them, if have one to add go to my #namethatdoll page, here. Funny fact a write a them down on random pieces of paper as I come up with ideas, then add them to the website.
2. Next I have to pick the fabric and for an Analina Rag doll that is picking the: dress, apron, bloomers, hair, skin tone, legs, bow, and feet. That is a lot of different colors that have to work well together and blend. This may not seem like a lot but I would challenge you can go to the fabric store and find 7 to 8 fabrics the match. Matching fabric in general can be hard because each dye lot is different. I also love to mix prints with stripes, spots, and other fun prints.
3. So with all the fabric picked out you need to decide what goes where such as what color is the dress. Believe it or not it is not easy to pick out each piece, many time I will rearrange them several times before deciding. Because lot of time one fabric looks much better next to another, another fabric also does but they look bad next to each other. This would result in the fabric that matches both would be the dress and the other 2 would be either the apron or bloomers (this is because they aren’t close enough to clash with each other). I also have several extra pieces of legs and feet to pick from so if something does not I can change it quickly. The print has to be just right to look good too, like I love striped the bloomers and the feet to be something unique.
4. Now on to picking the eyes, nose, and hair. My Analina Rag Dolls are all different color eyes and usually one of a kind pieces. The hair and eye color depends on the name and personality and some times the clothes. The nose is usually a close color to the skin tone. But for the most part I have an inspiration when I make up a certain doll. I get a lot of my inspiration from people around me, tv, movies, and more. My doll’s hair is also not one color there are many different fabrics that go into it, I call them highlights. Therefore, can be any and/or all colors like my twins Neveah and Charlie.
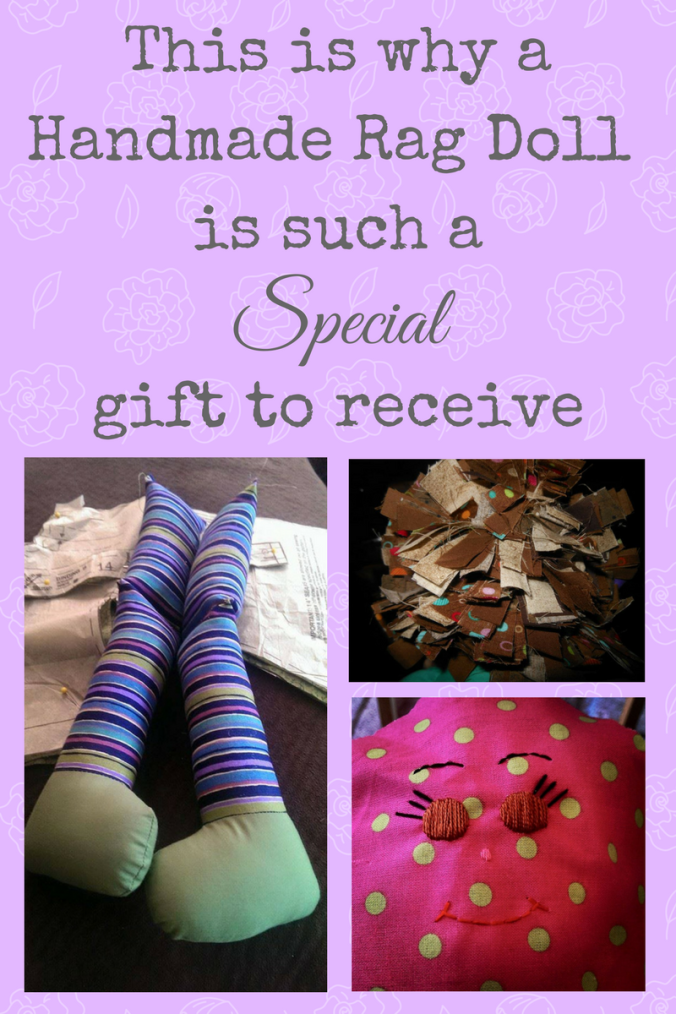
5. Cutting everything out, this can take a bit of time (especially if you pattern piece are not ready to go). Fabric has to been laid out in a big table and ironed may times. Then the pattern needs to be pinned down and cut out; I do love cutting lol (not a lot of people do). Also the print has to been laid right and the stretch has to right for certain pieces. If you are cutting out certain piece to make them stand out, like a flower for the foot, that has to be right too. Lots of time I cut a lot of dolls at once to use every bit of fabric.
6. Now the face needs to be embroidered, yes I hand embroider all my faces. The color was picked out on the step above but I embroider their faces after I cut them out. I do hand draw their faces on then embroider over that, here is a photo.
7. After the cutting is done it is time to get ready to sew, you need thread to match everything and all the piece laid and ready to go. For me, I like to sew all like colors at once because changing thread is a pain. So I like to laid everything out like feet together in pairs, shoulder pieces together on the dress, or bloomers pieces together. (it saves time) Then you have a sew it all together until I have to change the thread color, then I will repeat that with each color. One of my doll’s dresses also has pin tucks in it, so I need to sew and iron at the same time. Her whole outfit is more detailed and takes a lot more time to make.
8. Sewing and turning everything and sewing again. Making the doll it self can be a big pain, especially with the smaller the doll, this is why the small dolls still cost a bit. The turning is harder with the smaller pieces and with my 13 inch doll, the arms and legs are sewn on the body stuffed. There are also seems in the bend of the legs and arms which is stuffed too (this is tricky to make it look neat). I make 2 different dolls and their clothes are so different one with more pieces than the other, which makes it more time consuming. But each has it’s own problems and tricks that have to be know.
9. With all the sewing done there is still more, there is elastic, snaps, and buttons (sometimes) to put on the clothes. Some of my doll’s clothes are also hand sewn like the doll’s neck band binding closed, like in this photo.
10. Then there is the stuffed of the doll and making sure it has the right shape. Yes lots of times I stuff a doll and the head is not right so I take the stuffing out and resew. Making a dolls head even can be a tricky and magical moment when it happens. This is also true for the feet because of the curve it is hard to get them to stuff and look right. Lots of time the feet end up with a point not a curve and need at least 2 resewing before it’s right. I have had a crazy time with a set of legs until I figured out how to sew them the right away.
11. Now that the doll is stuffed, it is time for the hair. I have a a blog post and video about how I put my dolls hair on, here it is. But if you don’t want to click, I pick out the color (from step 4) and cut it into small piece. I sew 2 pieces at a time all around the head, this process can take up to 5 hours depending on the size of the doll. This is how I use most of my scraps to prevent waste, which is part of my low waste business plan.
12. I also put a bow on most of my girl dolls, this goes on after the hair is done. I would have already picked out the fabric to match the dress and apron, and I would have sewn it back in step 8. I do hand sew this on the doll head on whichever side it looks the best on. Yes, a doll has a right side (lol).
13. Finally it is time to dress the doll and make sure all fits good.
Here is a Link to the patterns I use to make my rag dolls, this is 16 and 22 inch dolls and 13 and 20 inch dolls. This process can take about 10 to 12 hours per doll from start to finish. Unfortunately, I have never really made a doll start to finish without stopping because working a home and stopping and going is part process it self. I love being able to work at my own pace and being able to stay home with my children. As a single mom of 3 (2 of them have Autism, Bipolar, and ADHD) I do know how luck I am to be able to get all their needs met such as dr appt, therapy, and daily struggles.
Back to the dolls, as you can see I really only make my fabric cost back and a little extra. If I changed an hourly rate a doll would cost way over a $120 each, crazy right. It is about the love and thought that goes into making a doll not the hours spent. This is way a handmade rag doll is so special to get a gift or to even buy one for your self. My dolls are mostly one of a kind because of the uniqueness of each one.
I do have an infographic about custom ordering a doll your self both Analina Rag Doll and a traditional Raggedy Ann or Andy doll, here.


These dolls are super cute and handmade items are such a wonderful gift to receive.
thank you so much